The Riven Diffs
Seeing Riven (1997) Differently
Part 2 of 2 in Riven (1997)
This article, by Guillaume Lethuillier and Twitch, is also published on Twitch’s website (which contains additional images by combining animated diffs, highlighted diffs, and pairs of original images).
Disclaimer: This article contains spoilers applicable to both versions of Riven.
Just how stable is Riven? It is well known that Gehn’s unorthodox writing methods invariably produced Ages that eventually fell apart, and Riven in particular is demonstrably close to its inevitable collapse. But do we see any symptoms of this in-game? Besides the endings, Riven appears perfectly normal to an untrained eye. But what if we look closer? What if there are anomalies in plain sight that we simply never noticed before?
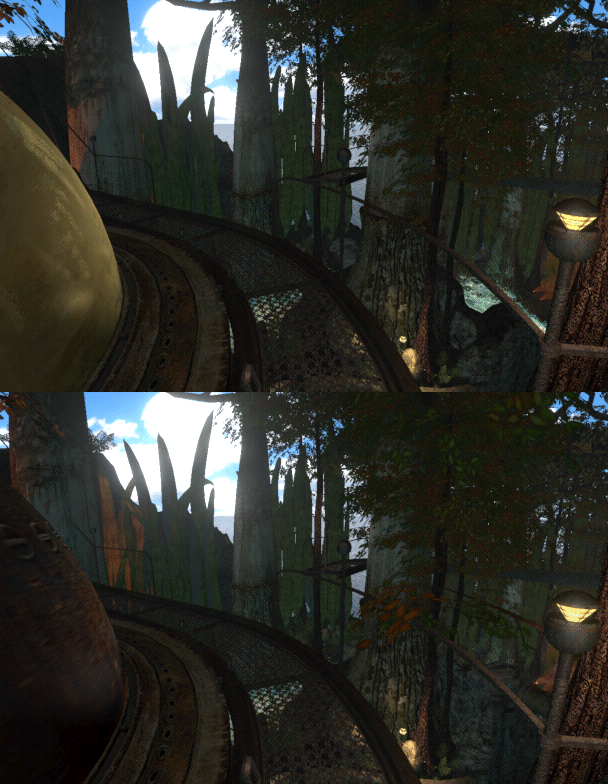
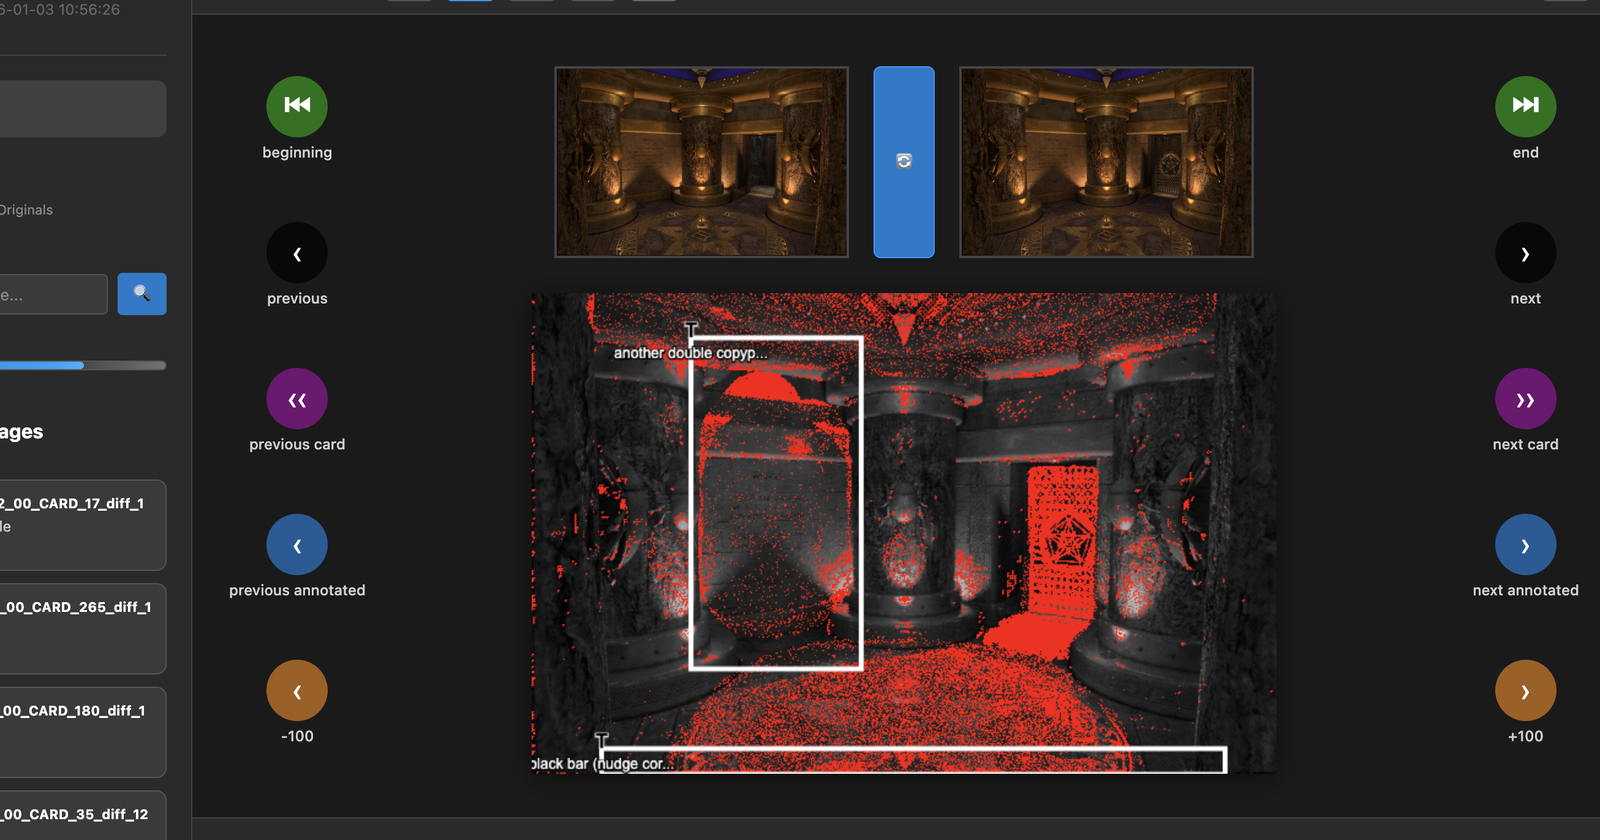
While Myst relied on the interpreted HyperCard engine, Riven uses the Mohawk engine instead. Conceptually, Myst operates on a simple one-view-per-card model where each image represents fixed render states (see the Myst Graph articles). In contrast, Riven’s Mohawk engine allows for dynamic changes within cards by enabling multiple rendered views to coexist on the same card, with the engine displaying the appropriate render based on the current state of the game world. In short, where Myst’s cards represent static views, Riven’s cards can represent multiple different versions of the same viewpoint. This discovery led us to develop an exploration tool, the “Riven Navigator”, that allows for side-by-side comparison of these renders. Where the Myst Graph revealed development insights through card relationships, the Riven Navigator uncovers them through visual differences.
Since renders took significant amounts of time in the 90s, and different worldstates were often rendered at different stages in development, many renders have subtle differences beyond the changes caused directly by the player. Most of these are virtually impossible to notice due to the worldstate changes being triggered in separate locations from where the actual differences are visible. But when you compare card differences in-place, changing the worldstate without moving the camera, they can become much more obvious. Such tools reveal many places where tweaks to the 3D scene were made between renders, resulting in changes to the world far beyond the changes being made by the player.
The tool, introduced in this article and now open source, provides a methodical way to analyze the unique differences between images composing a given card. For instance, when a card contains three images (A, B, and C), the Navigator generates three unique comparative analyses: A versus B, A versus C, and B versus C. These differential comparisons, which we call “diffs”, are visualized through two complementary modes:
Pixel differential rendering: By default, the tool combines both images into a black-and-white composite, with red pixels highlighting mismatches between the two views. In many cases, the differences visible here will be caused by changes to the dithering or the color table, resulting in false positives, but quite often it can highlight small but very real changes that would otherwise be hard to spot.
Animated comparison: Reviewers can toggle a rapid succession mode that alternates between the two images (similar to an animated GIF), making differences easily visible as points of motion in an image that is otherwise mostly unchanged.
Typically, a card will have multiple diffs. The number of differences follows the triangular number sequence: 1 render produces 0 diffs; 2 renders produce 1 diff; 3 renders, 3 diffs; 4 renders, 6; 5 renders, 10; and so on (sequence A000217 on OEIS).
Example of the tool in action
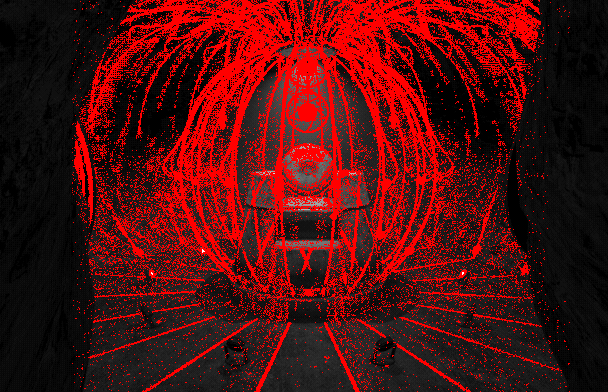
Example of pixel highlighting: the spider chair activated/deactivated, from Temple Island, card T11.
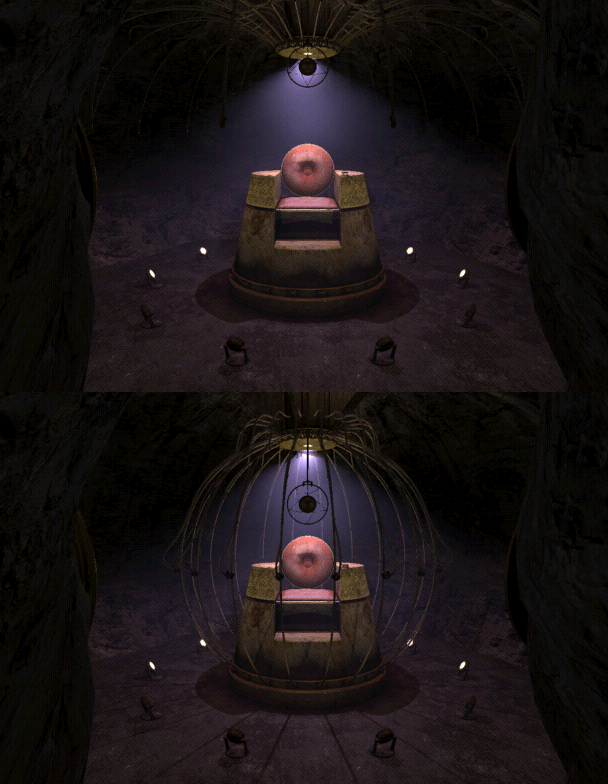
The same diff, as an animation.
We then began systematically examining these differences, expecting to find rendering glitches tied to game logic. This was a fun and almost philosophical experience: we could call up different moments in time from the same place, without having to move around to change the worldstate. It is like wearing magic glasses that represent the same location from different points in time. This article, and the follow-up articles, explore these findings in depth.
We use the following terminology throughout these articles:
ANOMALY: An “anomaly” is a visible rendering quirk. These can be caused by many things, including changes to the underlying world geometry that occurred between renders, mismatched splices, or other errors. Many anomalies are visible from multiple cards. Many anomalies require specific worldstates in order to be visible.
CARD: Anywhere the player can stand is a “card”. A card can have many renders assigned to it depending on how many different worldstates are visible from any given spot. Walking or turning moves between cards, but different versions of one spot will share the same card.
We label cards with a letter and a number. The number corresponds to the number of the card. However, different islands can share numbers, so we prefix each card label with a letter corresponding to the island’s label within the datafiles: B for Boiler, G for Survey (“garden”), J for Jungle, O for 233rd (“office”), P for Prison, R for Tay (“rebel”), and T for Temple. For example, card J127 (pictured at the top of this article) refers to card 127 within Jungle Island. These card numbers also correspond to the beginning of the filenames produced by the asset extraction tool Riveal by Ron Hayter, which was used heavily in the research and preparation of these articles.
Note: some card numbers change between versions and languages. The numbers in this article are based on the 1.2 version from the English 10th Anniversary DVD. If you’re using a CD release or searching for assets dubbed into a different language, the cards may be numbered differently, but we haven’t found any differences in the actual content of the renders yet.
WORLDSTATE: The “worldstate” refers to the state of all the player-actionable things, such as the position of a lever or an elevator. Whenever the player performs an action or the story progresses, the worldstate changes.
PATCH: A “patch” refers to a smaller picture or video that is placed on top of the background image in real-time by the engine. Patches are often used in places where many different worldstates are visible, to prevent the need for a huge number of renders covering every possible configuration. Patches are also used for the large number of very small videos that don’t cover the entire screen, such as when a spinning dome is visible in the distance. Patches are always rectangular, and are stored as separate images/videos within the datafiles, to be overlaid in real-time within the game.
SPLICE: A “splice” refers to when the image data of a render has been copied from another image or another render. These are sometimes used when only part of an image needs to be re-rendered, but a patch would not be appropriate or desirable for whatever reason. Splices are edits which exist within the finished render itself, and are not separate files like patches are.
FMV: An acronym for “full motion video”, referring to the many videos used throughout the game. Almost any time you see motion, it’s an FMV. (Rare exceptions include the water rippling effects all over the game, and the various minuscule flying bugs that appear in places like Jungle Island.)
OCCLUSION: In computer graphics, “occlusion” refers to when one object blocks the view of another object. When one object is in the foreground and blocking another object in the background, the background object is “occluded” by the foreground object. Several anomalies involve objects blocking one another in ways that are incorrect based on where they actually exist in 3D space; these are problems with occlusion.
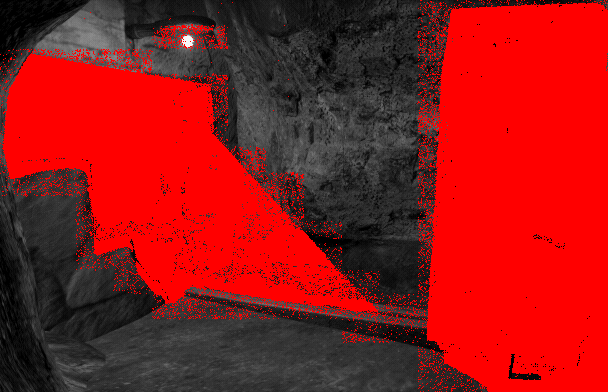
An example of a “Splice”: the rectangular edges are easily visible in the differential comparison of J191.
Part 1: Jungle Island
Jungle Island is a location very familiar to many of us, but it has a large variety of anomalies, making it suitable as our first point of examination.
Several anomalies are associated with the state of the spinning dome (this is a recurring theme—every single spinning dome in the game has anomalies). In cards J121, J124, J133, J154, and J421, the two semicircular “hinges” that sit at the base of the dome are occluded incorrectly, making them fully or partially obstructed by other geometry depending on whether or not the dome is flipped. In J124, you can also see the hinge switch from high to low polygon count.
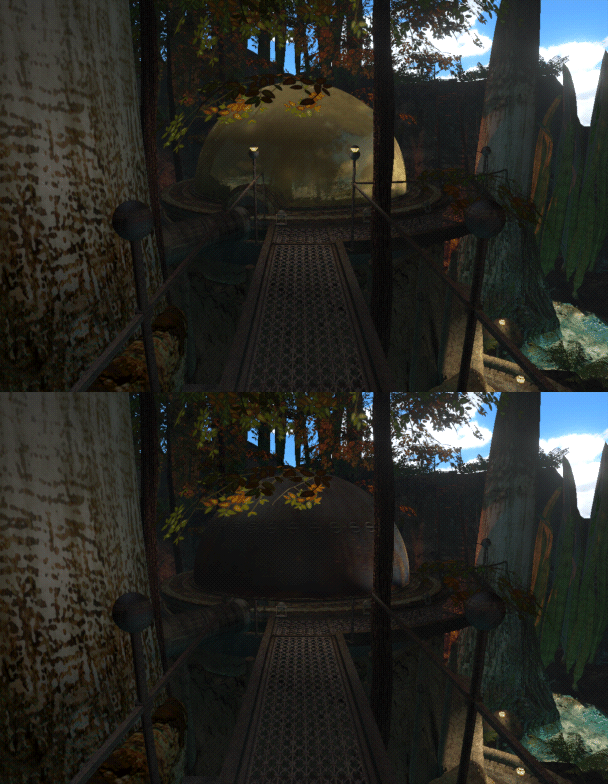
J121: the semicircular hinge at the right of the dome’s base.
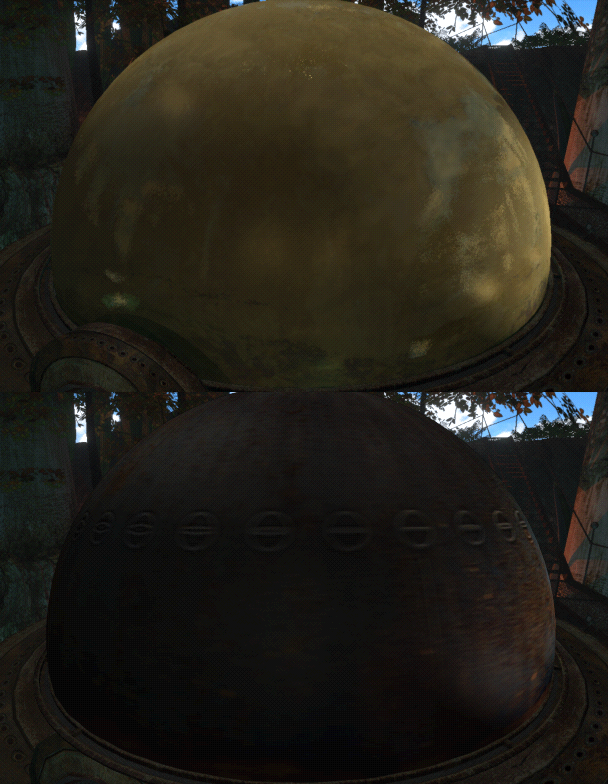
J124: the hinge at the lower left of the dome’s base.
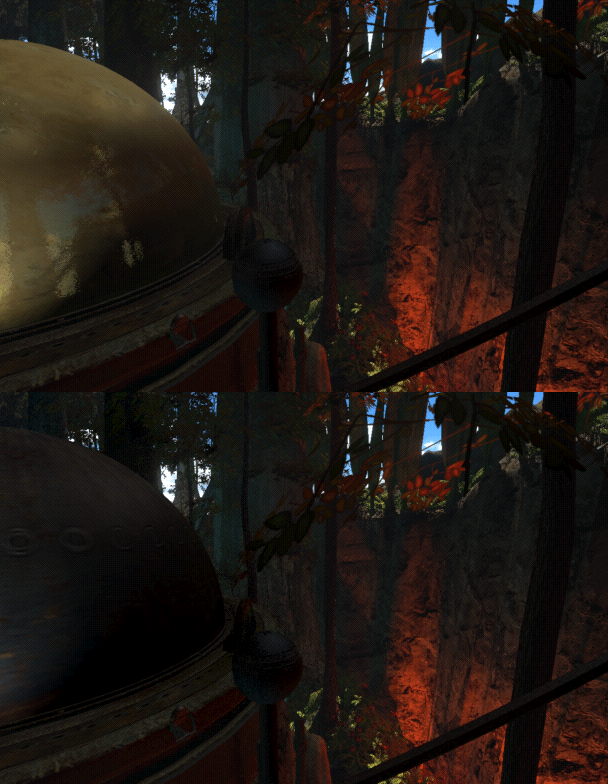
J133: the hinge at the dome’s base, near the lamp.
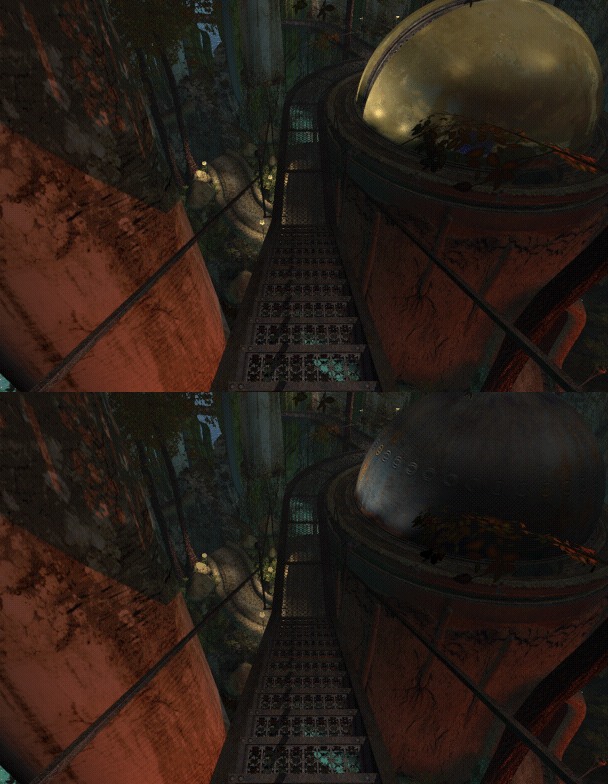
J154: the base of the dome, behind the leafy branch.
In card J130, the base of the dome visibly moves when the dome is flipped.
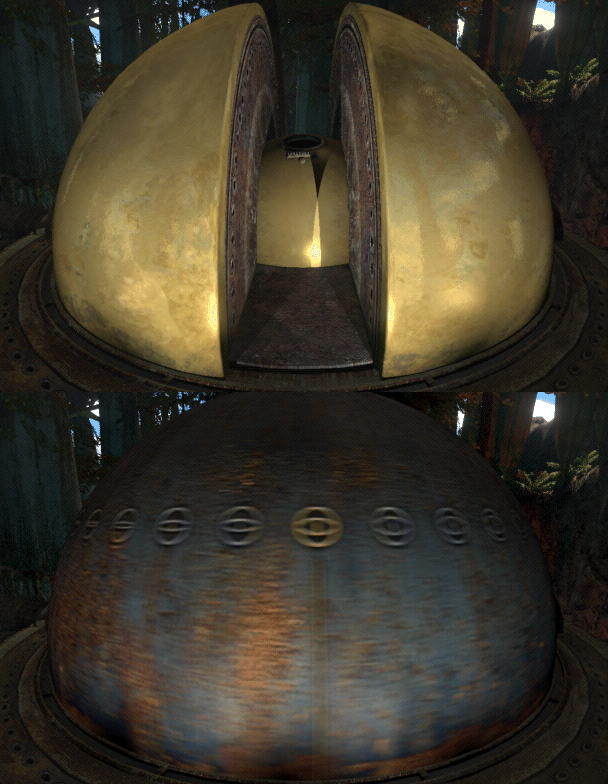
J130: the base of the dome.
Card J154 is also the location of one of the Spyder easter egg renders. A direct comparison with a normal J154 card reveals that the camera is in a different spot. Also, the furthest of the spherical lamps in the easter egg has been raised/lit like many of the others along this walkway.
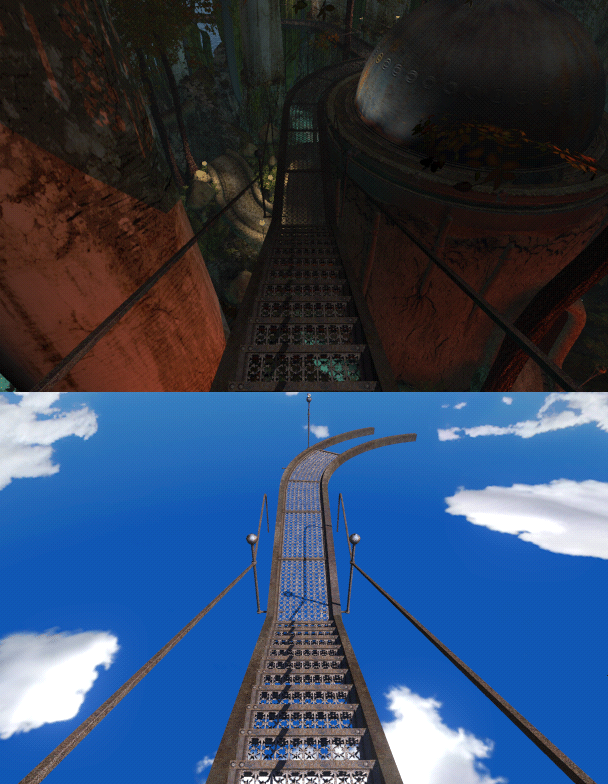
J154, the normal render and the easter egg render: the stairway is seen from a different camera position.
In cards J110, J119, and J127, the foliage changes (quite drastically in J127) when the dome is flipped. J119 also has some leaves incorrectly occluded by parts of the dome when closed.
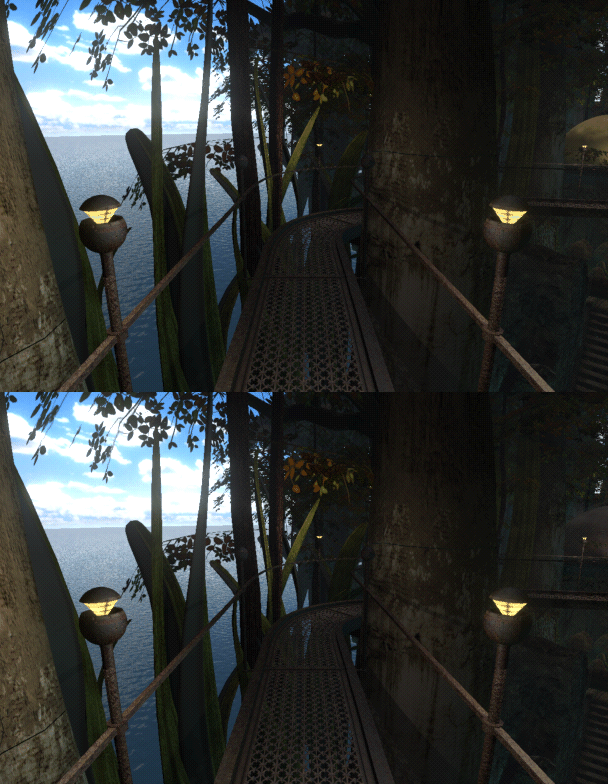
J110: a few leaves at the top left.
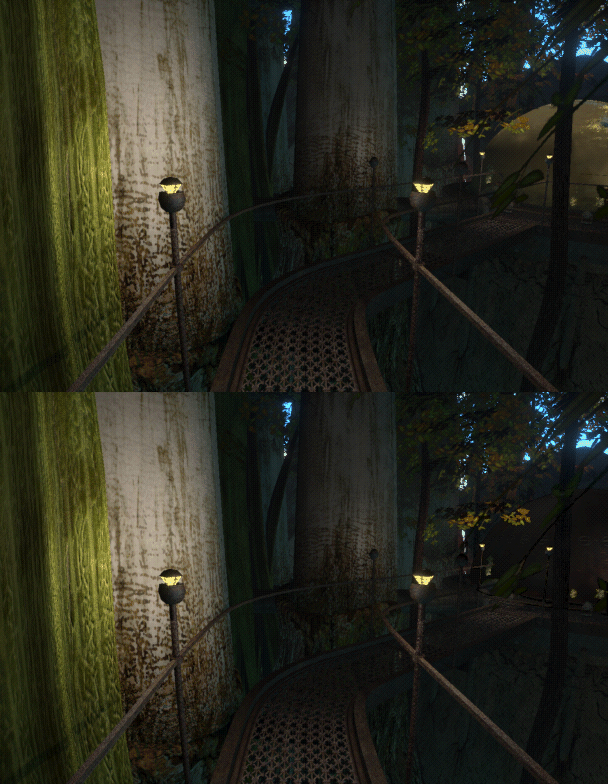
J119: the leaves in front of the dome.
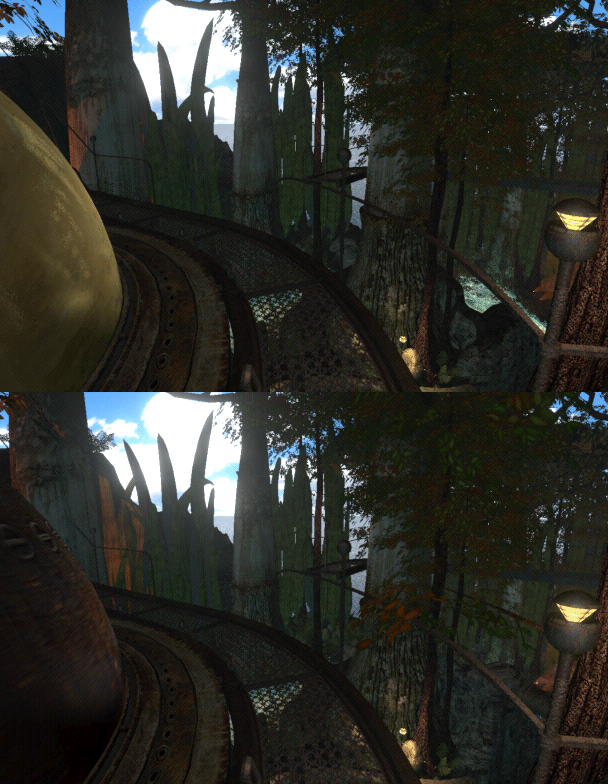
J127: the foliage of the trees on the right and at the upper left.
At the top of the wahrk gallows, in cards J178 and J264, the doorjamb to the prison changes depending on whether the door is open or closed. In card J264 the entire jamb changes, and in J178 the differential comparison makes it obvious where the images were spliced around the jamb.
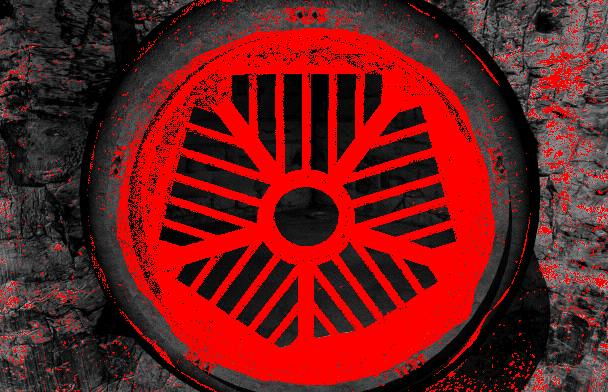
J178, differential comparison: the red area stops in a ring at the doorjamb.
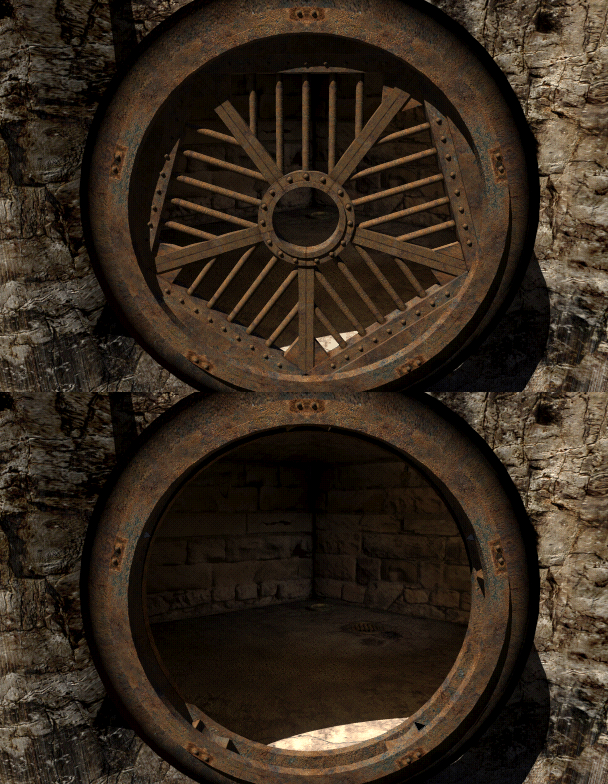
J178: the doorjamb.
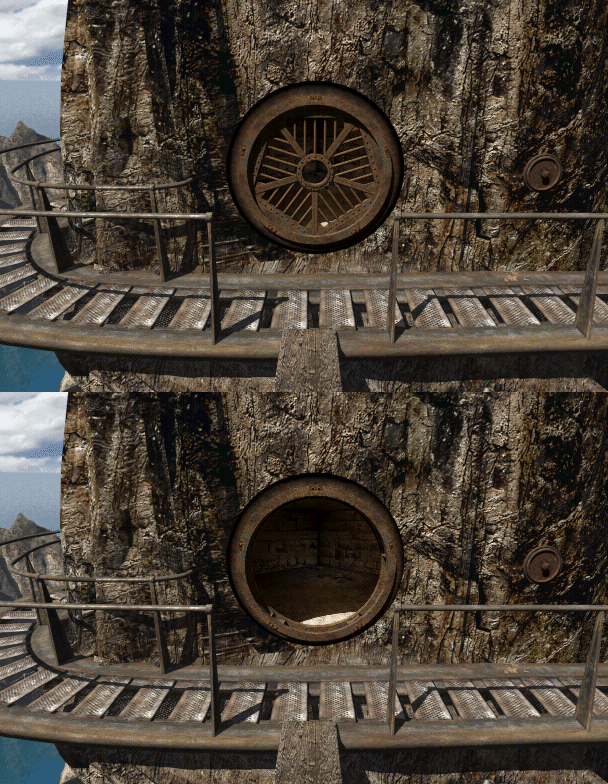
J264: the whole doorjamb.
There are two patches applied when you’re standing in card J181, one for the submarine and one for submarine dock 5 (the schoolhouse).
When the submarine is raised out of the water, the submarine overlaps the railing in the foreground of J181.
Furthermore, there is a patch that shows dock 5 extended, which is correctly used to show an extended dock 5 in J181 when the prison door is open. However, the render of the closed prison door already has an extended dock 5, and there is no patch to show it retracted. As a result, if you retract dock 5 before opening the prison door, you can see the schoolhouse dock retract the moment the prison door finishes its opening FMV.
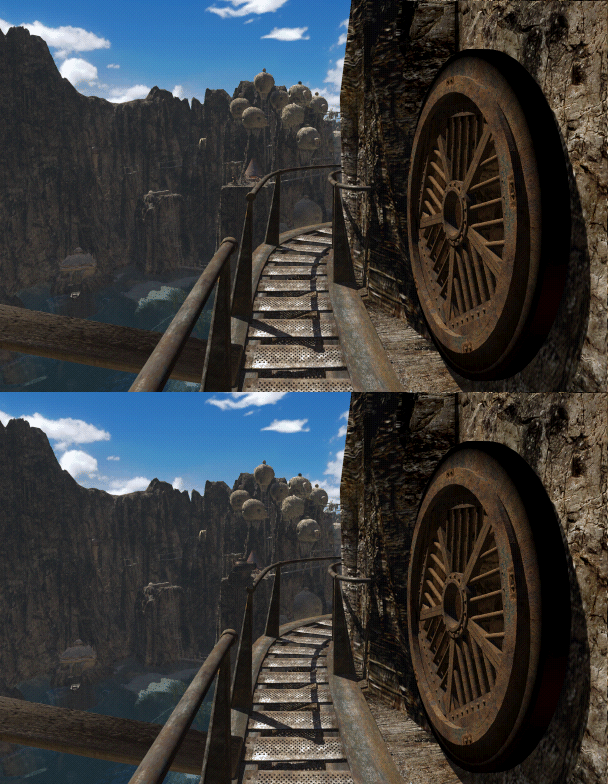
J181: the submarine, in the distance, overlaps the handrail in the foreground.
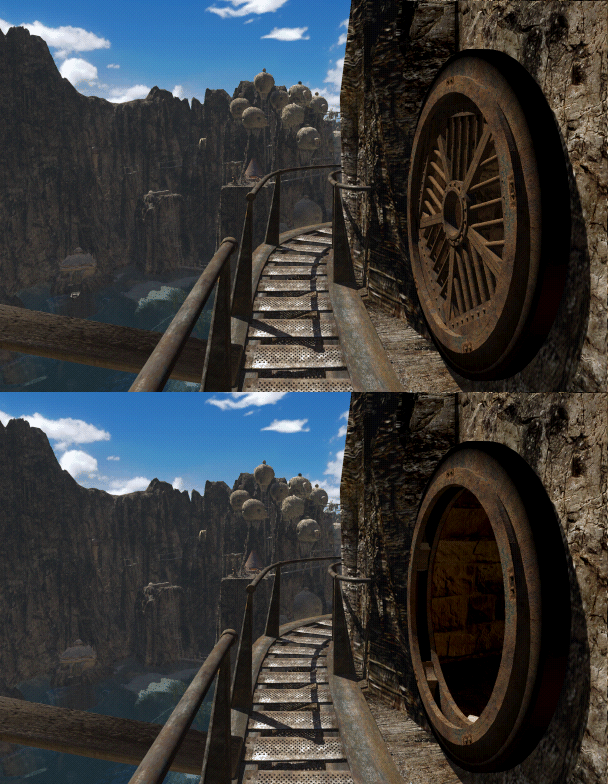
J181: dock 5, the small pale shape in the lagoon at the lower left, vanishes once the door is open.
Inside the tunnels, differential comparison revealed a render that seems out of place. If you turn on exactly 3 of the lights in the tunnel, when you’re walking back towards the ocean, there is one render assigned to card J194 that’s actually a render from the perspective of J196. In the differentials, this looks like the tunnel changing shape between worldstates. In-game, this makes it seem like one of the steps towards the ocean darkens the lighting without moving forward at all. The incorrect render may be from earlier in development, as it has noticeably egregious banding on the dim/gray parts of the image, which isn’t a problem on the correct version visible from J196, or anywhere else in the tunnel. It’s likely card J194 should be completely black when 3 lights are on, as it’s barely lit (with a correct render) with 4 lights on.
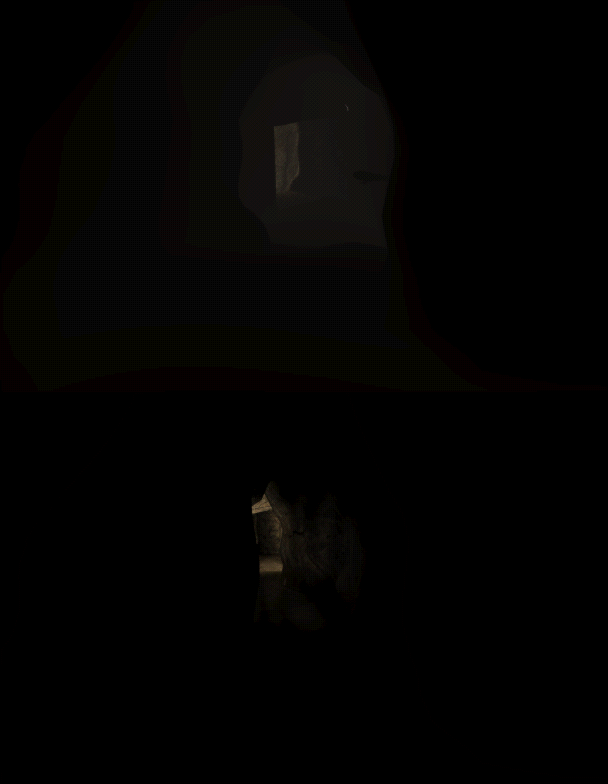
J194: the misplaced render, with three lights on, then the correct render with four lights on.
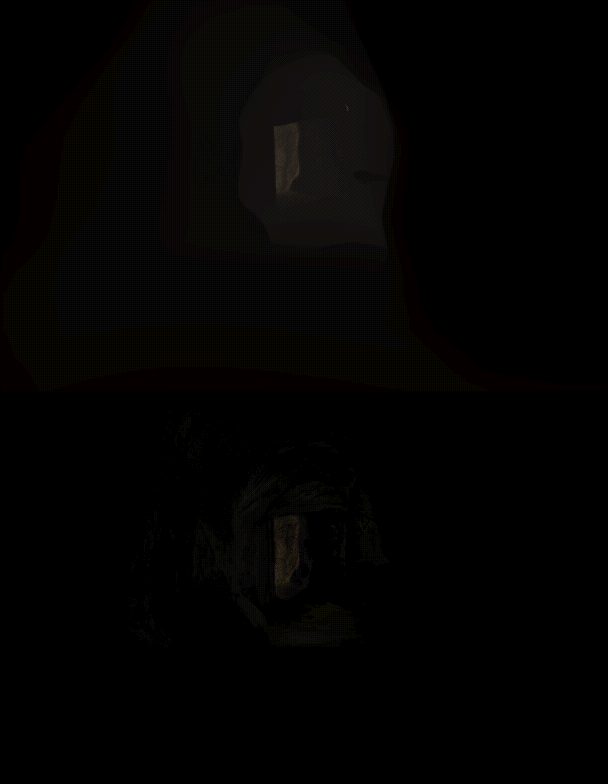
The misplaced render of J194, then the render of J196, both with three lights on.
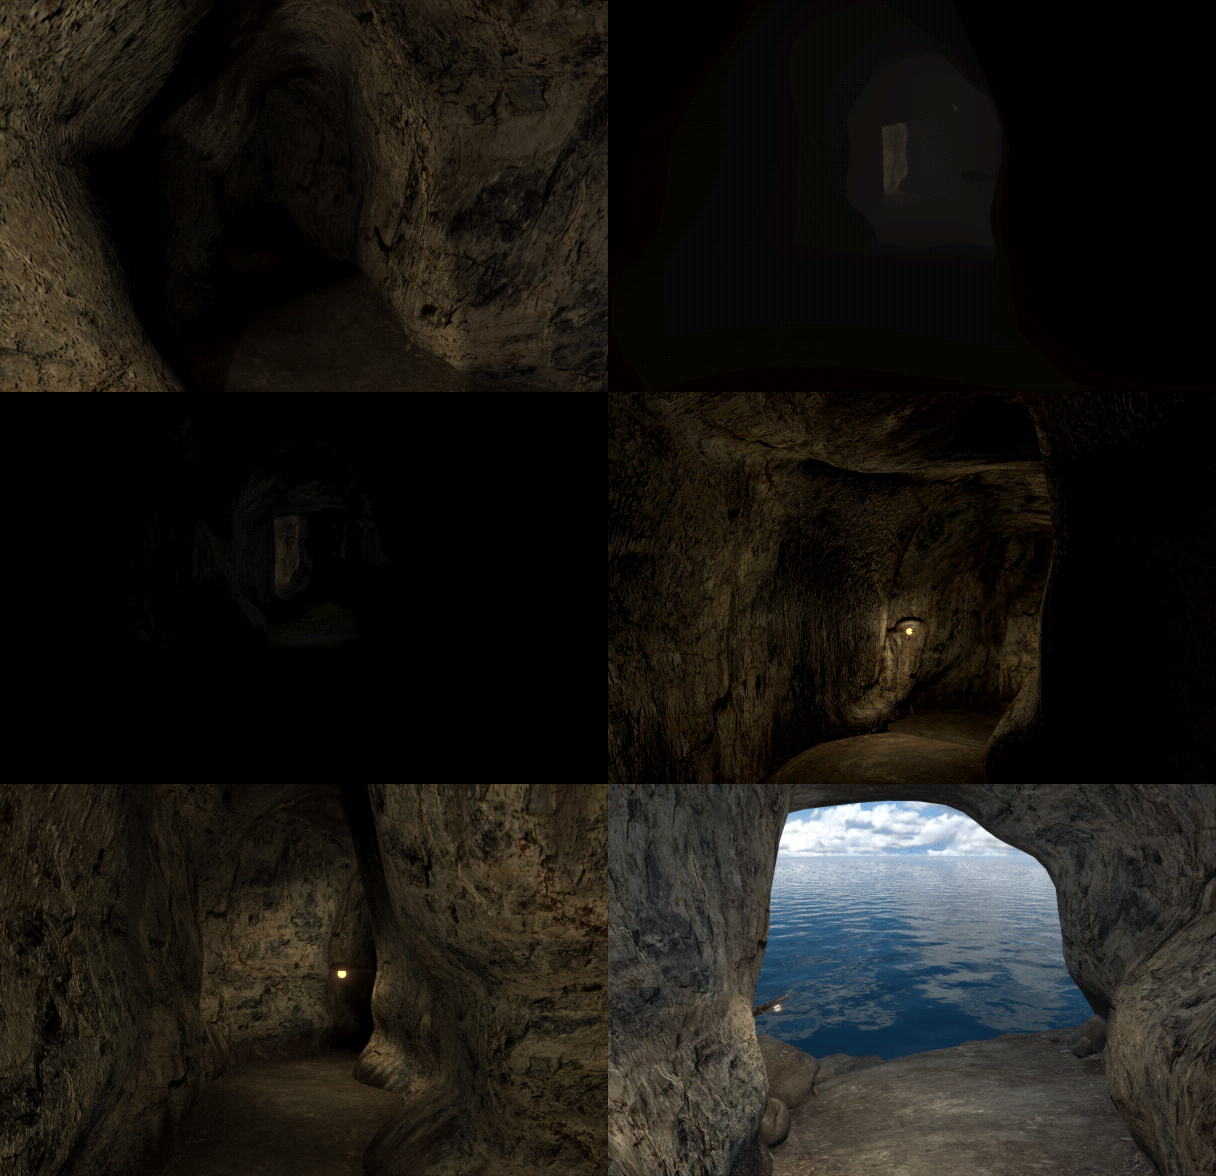
Walking down the tunnel toward the ocean, with three lights on.
Each of the 25 totems in the Tay book room can be raised or lowered individually. When you’re standing in the center of the room, individual image patches are used to allow arbitrary totems to be shown in the downwards state, and renders with Tay unlocked are made with the correct totems already lowered. However, the zoomed-in views on almost all of the 25 totems have all of the totems in the same state as the totem you’re currently zoomed in on. (Exceptions: J217 and J225)
Two anomalies are visible as a result: Firstly, and more obviously, when zoomed in on a totem, the visible edges of the 2 adjacent totems will be raised or lowered based on the state of the totem you’re currently zoomed in on. Secondly, in many of the totem views, a reflection of the room is visible on the water, which shows every other totem in the room raised or lowered in the reflection.
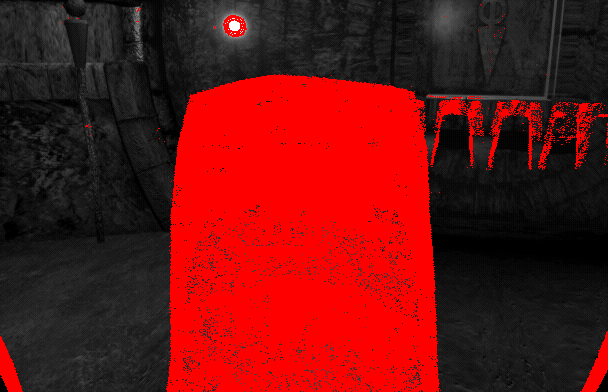
J221, differential comparison: the adjacent totems in the bottom corners, and the totems reflected on the water at the right.
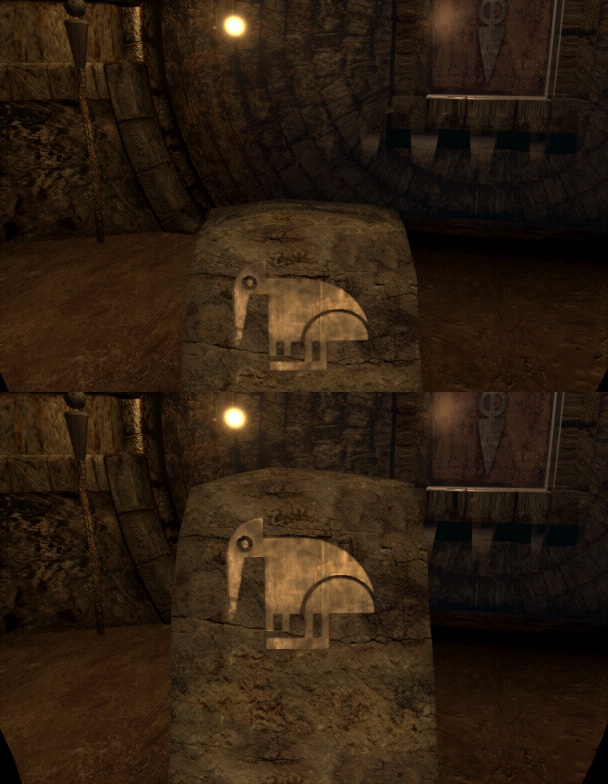
J221: the totems reflected on the water, at the right.
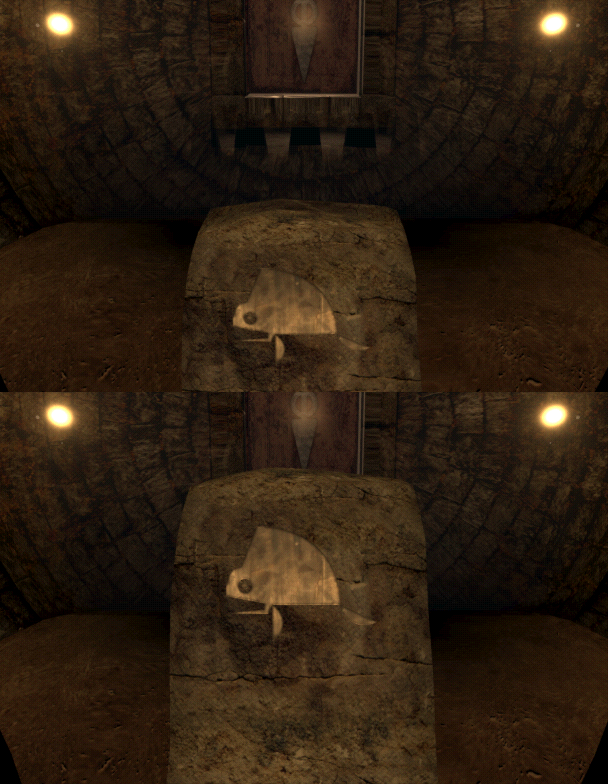
J220: the slivers of the adjacent totems in the bottom corners.
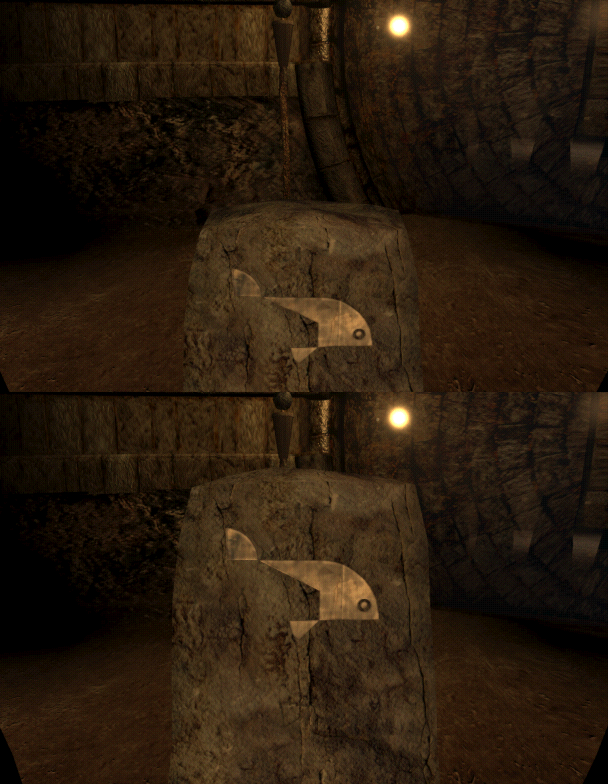
J222: the adjacent totems in the bottom corners, and the reflection at the right.
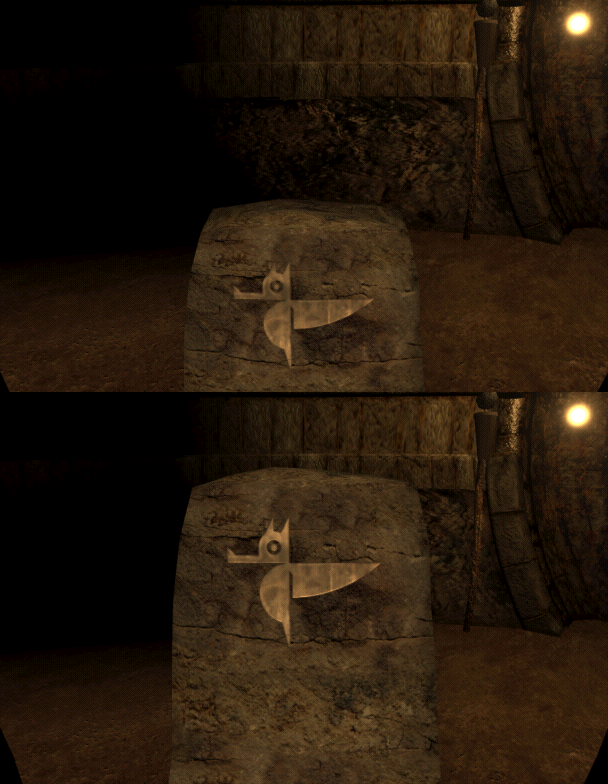
J223: the edges of the adjacent totems in the bottom corners.
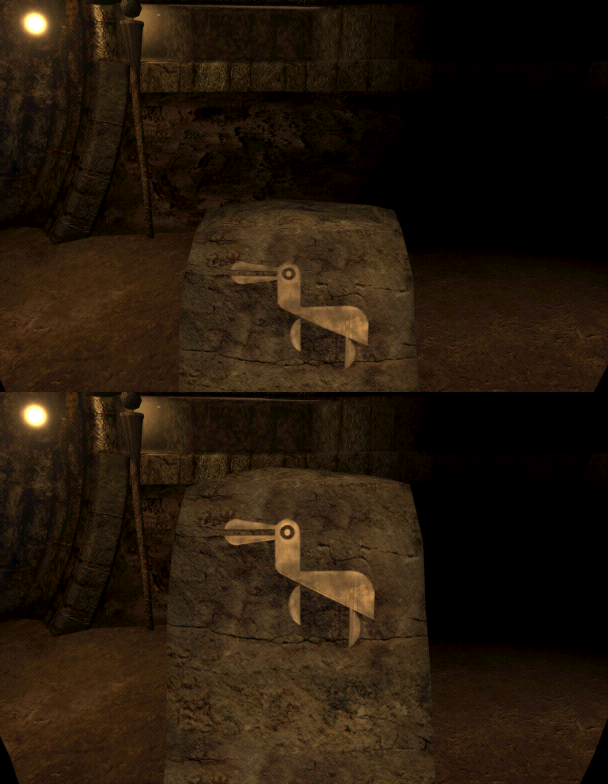
J224: the adjacent totems in the bottom corners.
Also, for some reason, a few of the totem renders have bright blue pixels on the extreme right or left side:
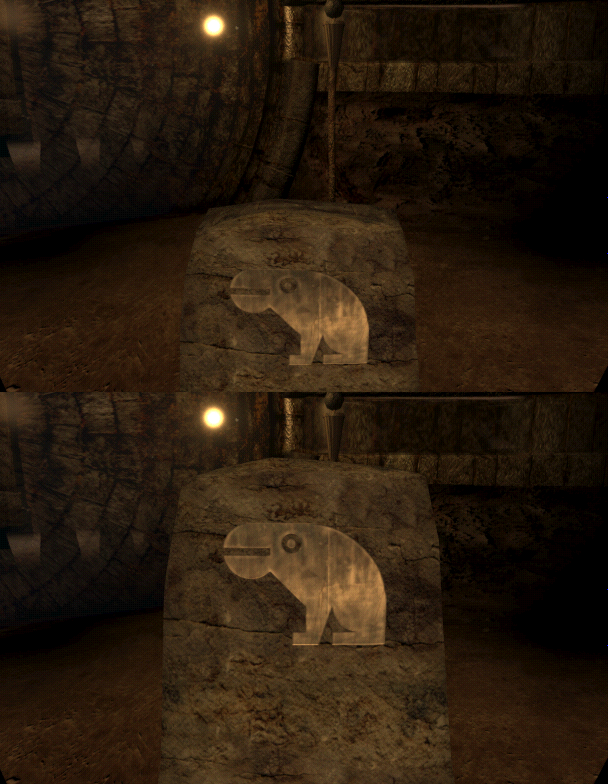
J225: two bright blue pixels on the right edge, in both renders.
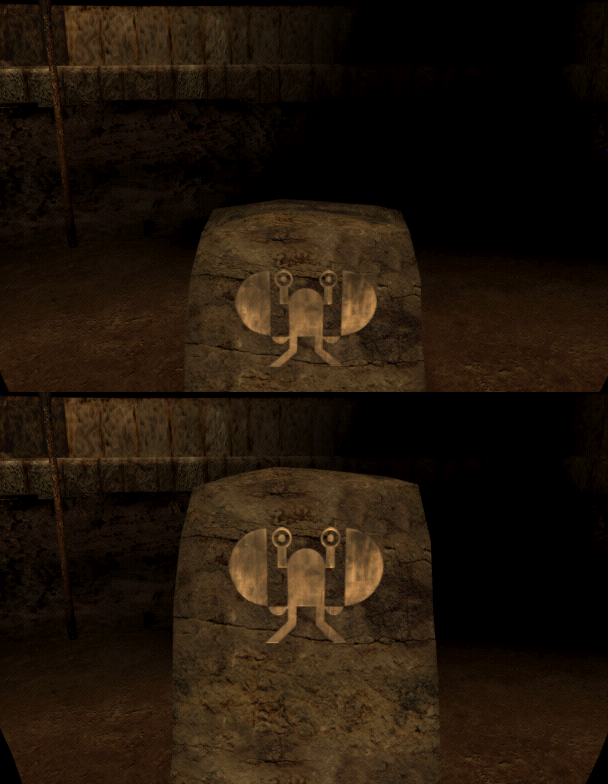
J231: one bright blue pixel on the right edge of the lowered render.
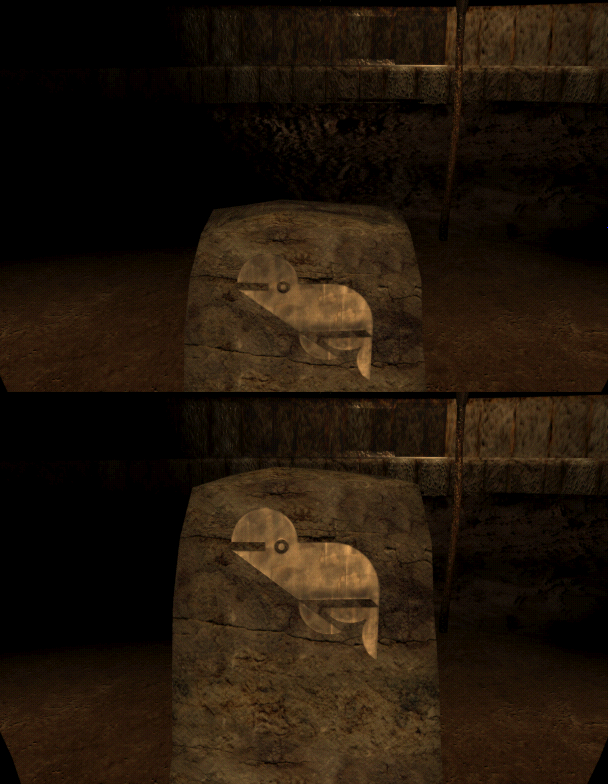
J233: one bright blue pixel on the right edge of the lowered render.
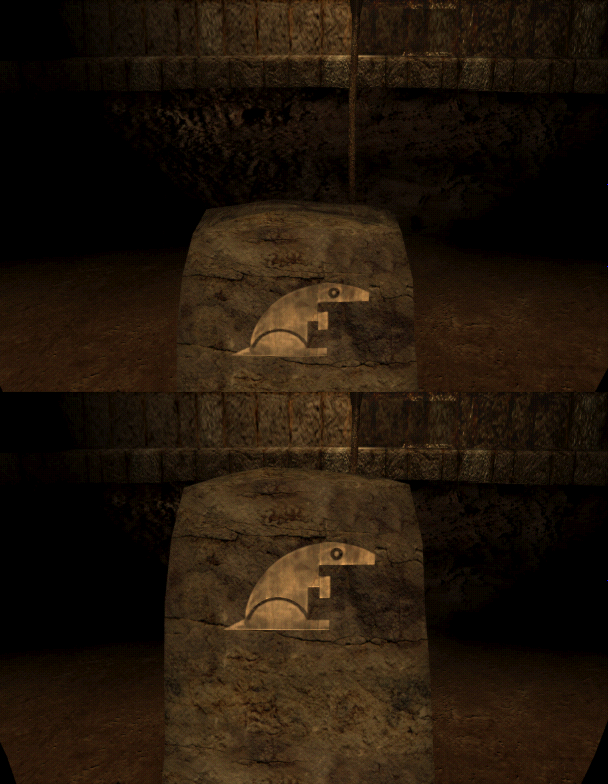
J239: bright blue pixels on the right edge, in both renders.
Furthermore, some changes to the lighting occur. A shadow changes visibly in card J241 based on the totem state. In cards J211 and J213, all of the shadows cast by the totems disappear when the Tay book is unlocked.
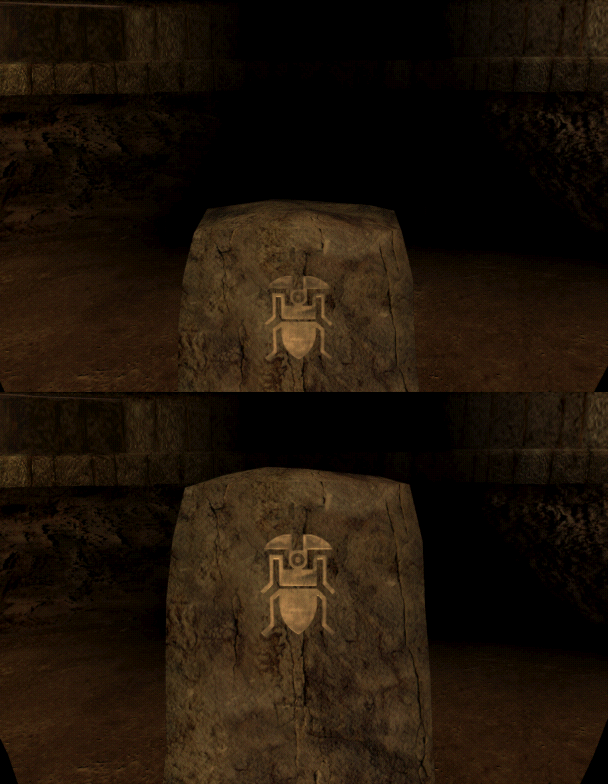
J241: a shadow changes with the state of the totem.
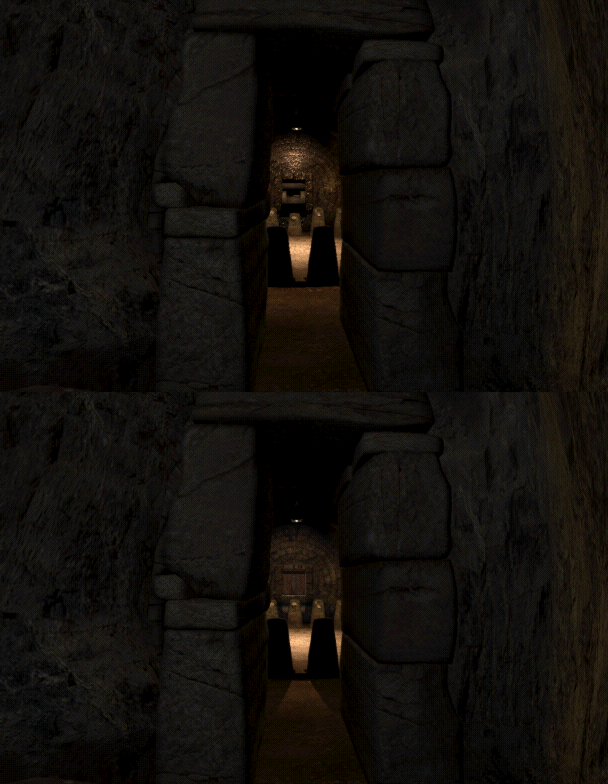
J211: the floor at the foot of the totems.
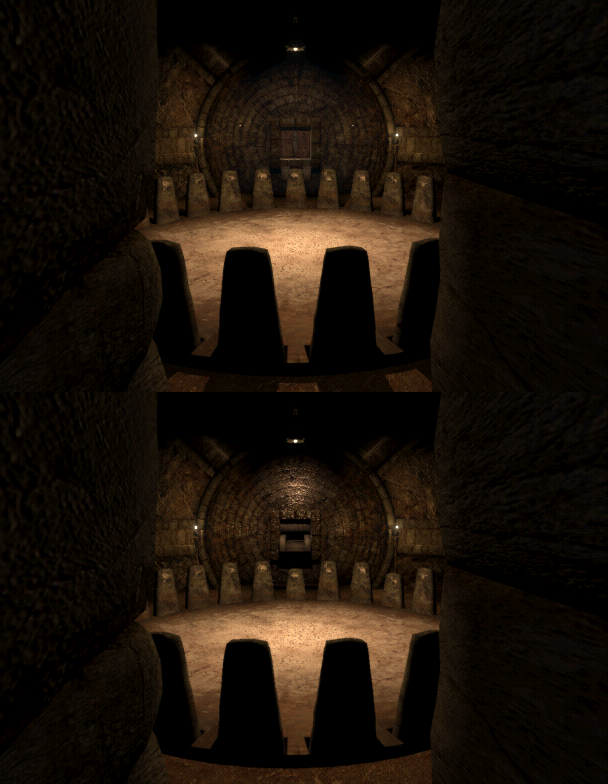
J213: the floor around the totems.
At the big wahrk head staircase, at card J375, some bright white bits in the jungle disappear when the wahrk is open.
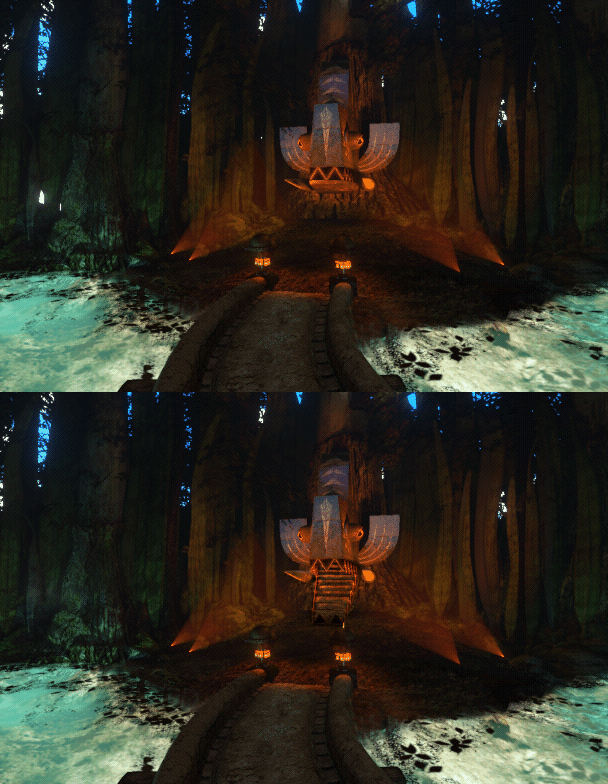
J375: a bright white spot among the trees at the far left.
Also, the angle of the camera in card J381 changes when the wahrk is open. Some foliage also changes, and the lighting overall becomes slightly brighter.
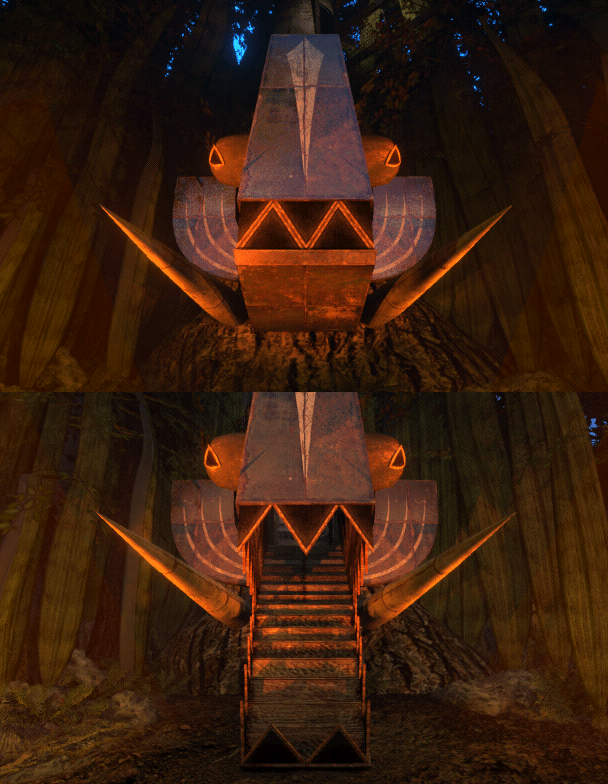
J381: the framing of the wahrk head, and the foliage around it.
At the maglev leading to Temple Island, at card J806, the rocks on the far left are different based on whether the maglev is present or missing. Also, some of the details on the concrete are slightly moved.
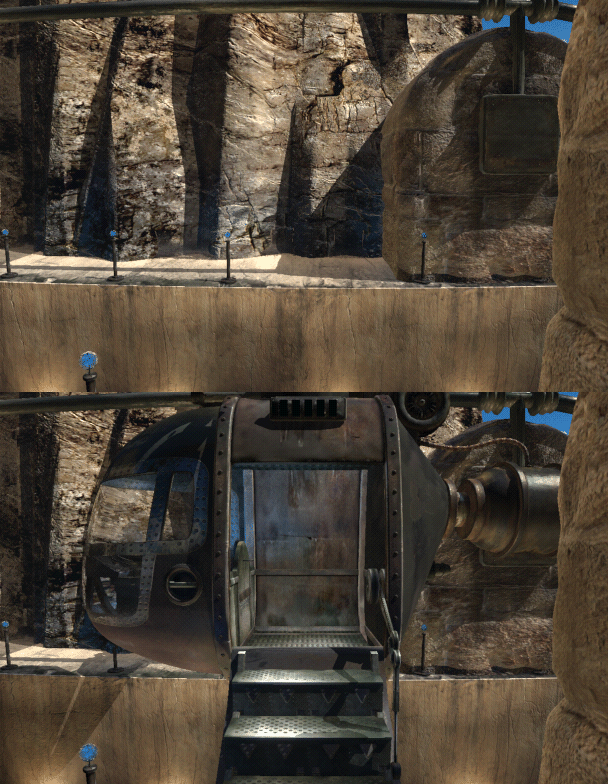
J806: the rocks at the far left.
A few anomalies depend on whether the sunners are present. In card J620, the rocks on the right change when the sunners are absent. Furthermore, in cards J620, J626, and J628, the horizon changes visibly based on the presence of the sunners. (In card J628, the mismatched horizon is only present if you enter the card while the sunners are awake/startled, probably to match the FMV.)
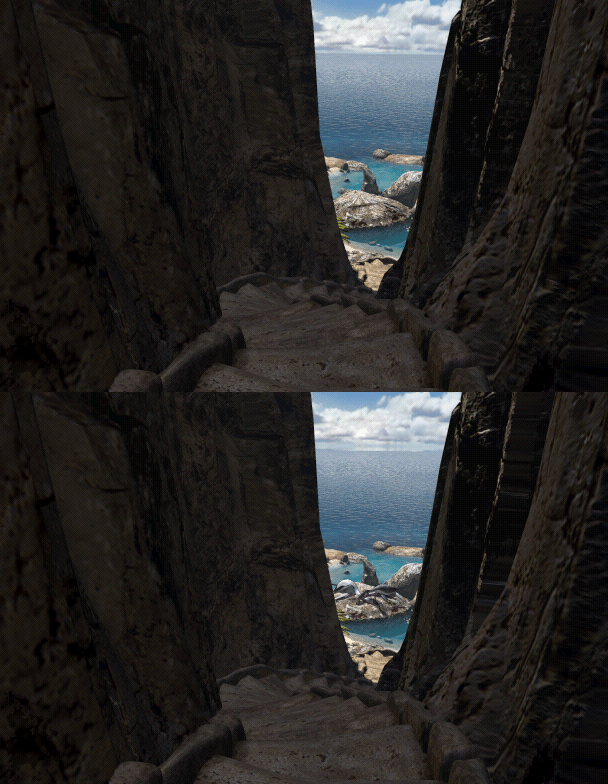
J620: the horizon line, and spots of the cliff on the right.
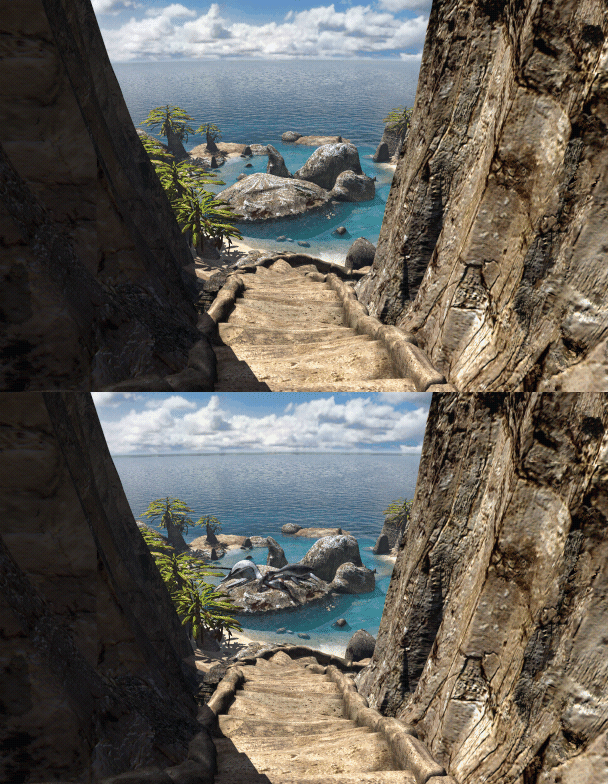
J626: the horizon line.
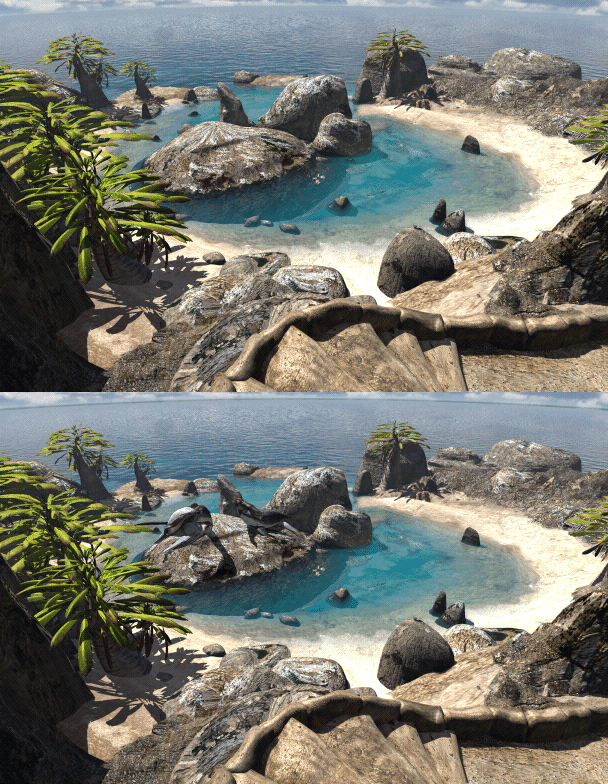
J628: the horizon, at the very top of the frame.
In card J526, the shape of the background mountains changes to match the FMV when you open the submarine hatch.
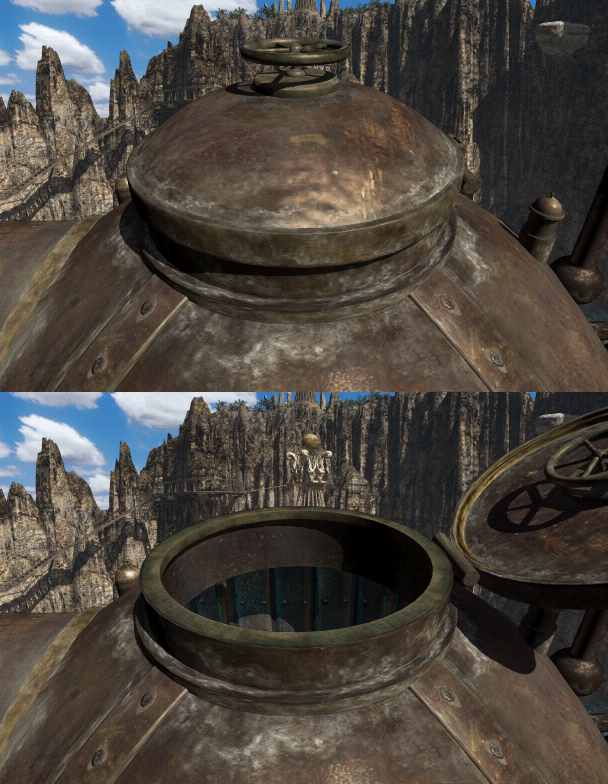
J526: the outline of the mountains in the background.
In card J296, if dock 4 is retracted, a red spot appears on the rocks when the submarine is turned around. It also appears some of the rocks change, but it’s unclear which of these changes are just reflections of the submarine.
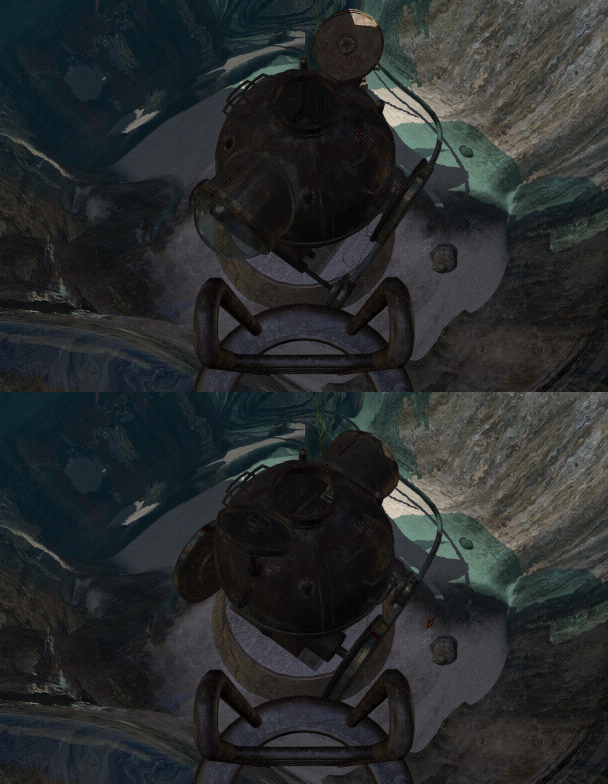
J296: a small red spot on the pale rock, to the right of the submarine.
In card J449, when the gallows shortcut ladder is still raised, submarine dock 2 will be completely missing when retracted. (The extended dock is shown using a patch.) Furthermore, when dock 2 is visible in any worldstate, it becomes apparent that the submarine dock is on the wrong side of the walkway, a quirk also visible in J447.
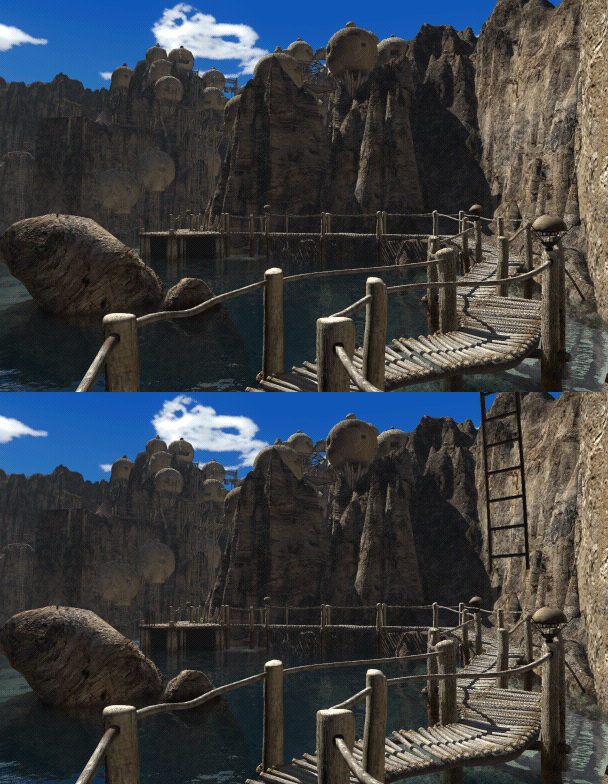
J449: on the distant platform, a small dark structure is missing while the ladder is raised.
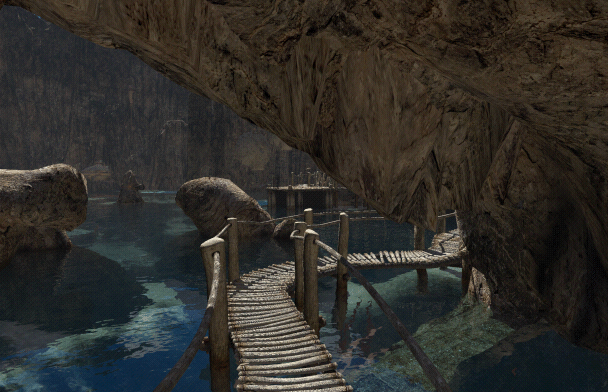
J447: the submarine dock, the railed platform in the distance beyond the walkway.
In cards J468, J470, J476, and J581, the diffs reveal that the shortcut ladder isn’t actually raised; the bottom half has merely been erased. Card J334 clearly shows that the ladder should be visible when raised.
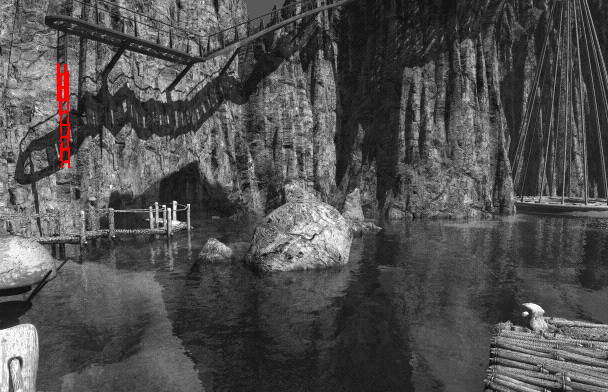
J468, differential comparison: the only red pixels form the lower half of the shortcut ladder, at the upper left.
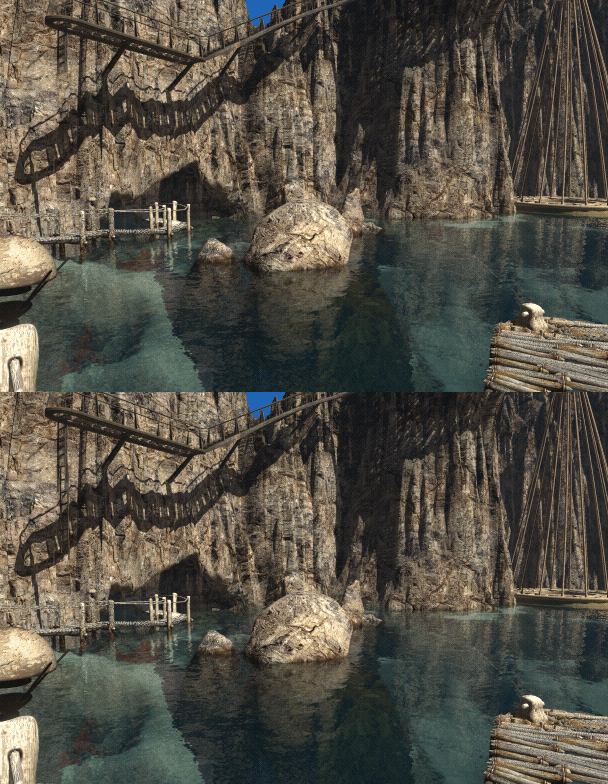
J468: the lower half of the shortcut ladder, under the cliff walkway at the upper left.
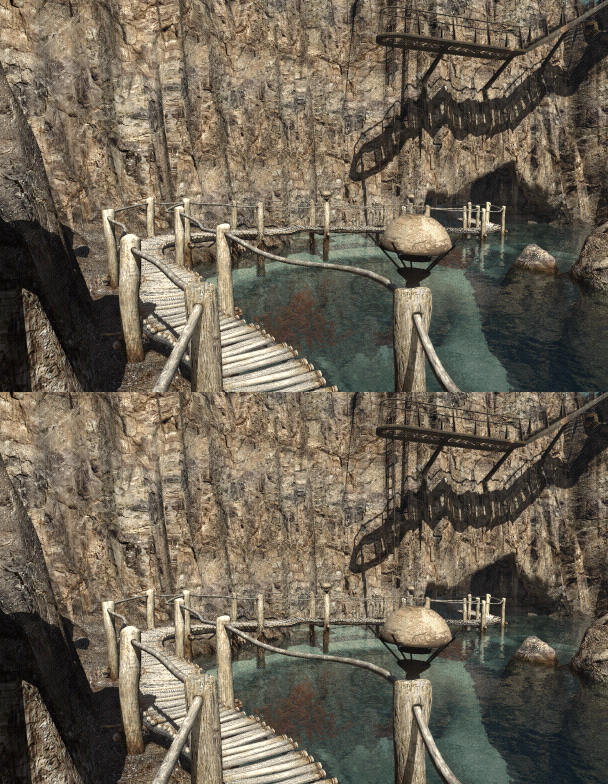
J470: the lower half of the shortcut ladder, under the cliff walkway.
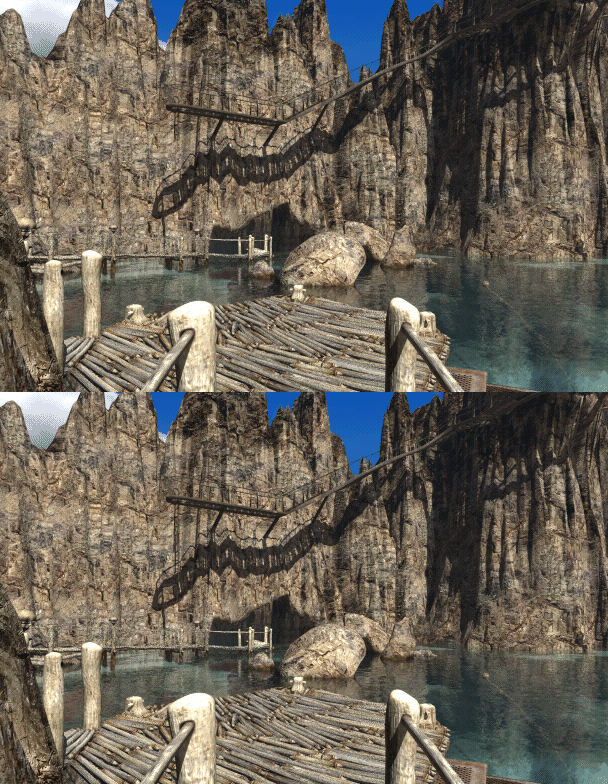
J476: a short segment of the shortcut ladder, left of centre.
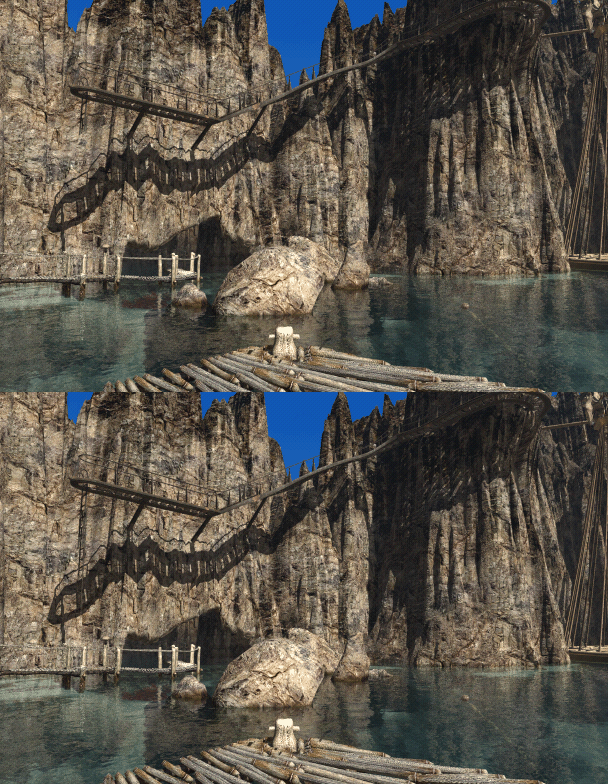
J581: the lower half of the shortcut ladder, at the left.
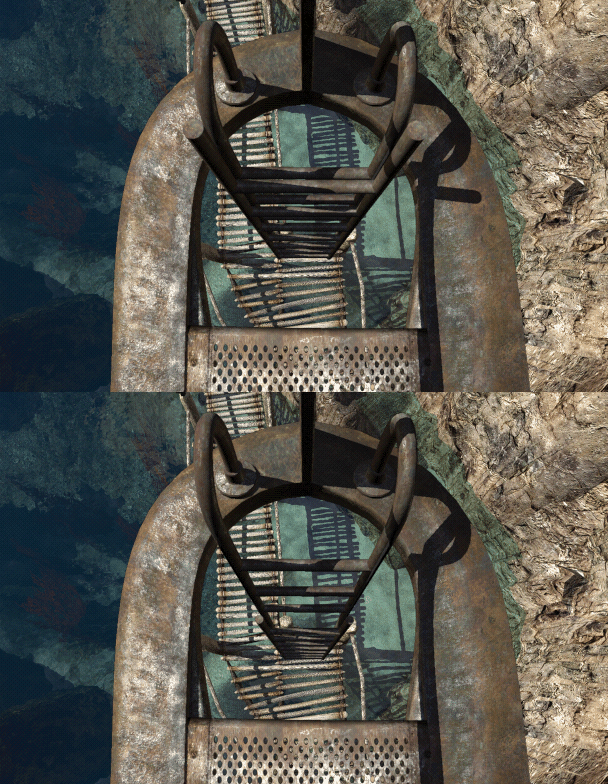
J334: the lower rungs of the ladder, seen from above.
Finally, in card J459, a detached shadow probably belonging to the shortcut ladder is visible on the leftmost cliffside at all times.
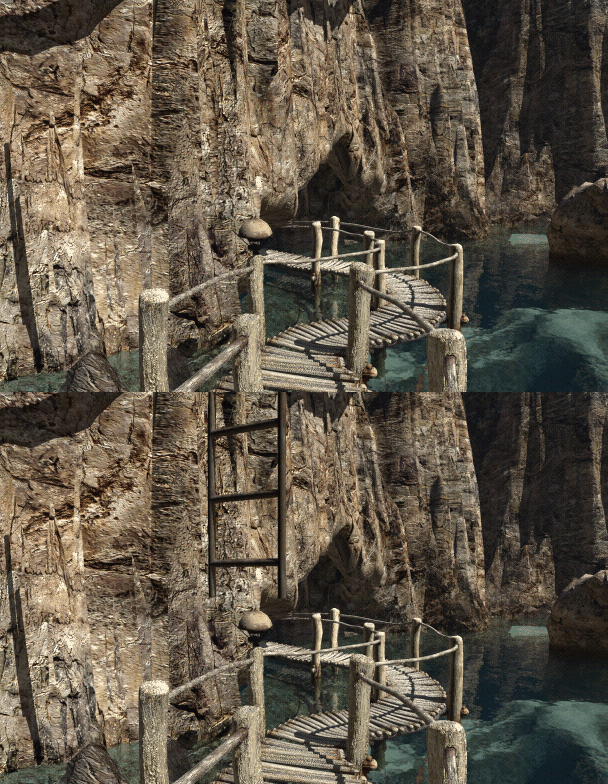
J459: a thin dark line on the cliff at the far left, in both renders.
Additional articles authored by Twitch, covering the large number of anomalies we have discovered across the entire game, are published on Twitch’s website, starting with Part 2: Jungle Island’s Patches, Tay, Age 233, and Prison Island.